
Art Deco House, San Diego. Canon Rebel XT, modified with “standard” infrared conversion by LifePixel. Olympus OM 18mm lens.
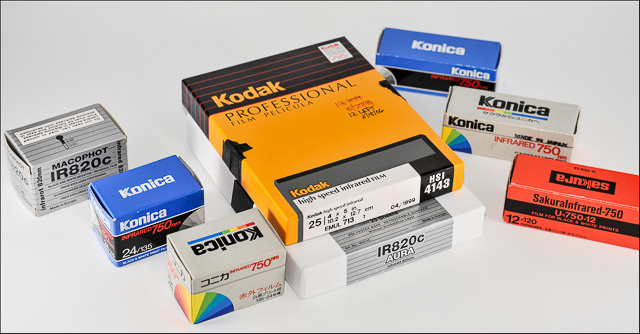
Which filter is best for artistic infrared shots? To be honest, I hadn’t though about this for years. Having spent a small fortune on infrared films and filters and concluding the Hoya R72 (now called RM-72) worked well for my purposes, I left it at that.
(I understand some people keep food in the refrigerator).
And then came digital cameras. When I had my Canon Rebel XT modified for infrared use by LifePixel, I got the standard conversion which meant an infrared filter with a cutoff around 720nm. The converted camera worked great and the filter was installed permanently so it was a done deal anyway.
My Canon G1X was is a different story. It got a “dual spectrum” conversion from Kolari Vision which meant that the camera could still be used for regular photography(!) but to work this magic it required a filter in the lens at all times and the two filters had to be swapped, depending on whether I was shooting “normal” or infrared. For infrared photos, I used a Hoya R72, a 720nm cutoff filter, and not surprisingly the results were similar to the Rebel XT with its built-in 720nm filter. So, for practical purposes, the only difference between the two infrared-modified cameras was that on the G1X, the infrared filter was in front of the lens and on the Rebel SLR, the infrared filter was permanently installed in the camera.
If I’ve already confused you, I apologize. At some point I’ll write an article that starts at the beginning and covers the basics. But there is so much of that on the web you needn’t wait for me to get to it.
The way this test came about is that the article I did for Photo Techniques magazine generated a bunch of email saying “I can’t get a blue sky” or “When I adjust the sky to look blue, everything in the photo turns blue”. There were too many variables for a one size fits all solution. But I remembered seeing photos on Flickr that had very blue skies. Very blue. Many of these super blue photos were taken with red filters such as a #25, an ordinary “medium red” filter, something every hobbyist had when we shot black and white film. Even the seemingly exotic B+W 091 “goldie” filter (so called because it admits enough visible light to allow yellowish/reddish foliage in infrared photos) was just a red filter, somewhere between a #25 medium red and a #29 dark red. The reason the goldie filter is an inexpensive infrared filter is because it’s not an infrared filter. But if you want really blue skies it may be a better choice, as we shall see.
All this made me curious and I realized my dual spectrum G1X infrared camera could be used to compare filters simply by putting them in front of the lens. Now, there was flash of inspiration!
Before we go any further, two things need explanation. First, these tests are only relevant to cameras that have been modified for infrared use by having their infrared-blocking “hot mirror” removed. Using an un-modified camera with a red filter–light, dark, whatever–will result in a somewhat darker sky (assuming it was blue to begin with) but you won’t come close to the almost white foliage you see in an infrared photo. Using a true infrared filter on an un-modified camera actually gives pretty good infrared results but exposures range from long to eternal, raising other issues like noise. Still, if you have a tripod and an stationary subject, it’s certainly worth a try.
Second, sharp eyed readers will notice the filters I used are of different sizes. That’s because I accumulated them over many years and for most of that time I used 49mm, 52mm or 55mm. Alas, the G1X takes a 58mm and I was not about to buy these filters again, so I used an assortment of adapters to hold them in front of the lens. Crude, I know.
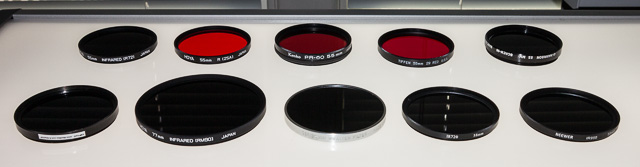
Meet our contestants. Top, L-R: Hoya R72 (RM72), Hoya 25A (med red), Kenko PR-60 (med red + polarizer), Tiffen #29 (dark red), Harrison & Harrison Infrared. Bottom, L-R: MaxMax X-Nite XDP, Hoya RM-90, Kodak #87C, Newer IR720, Newer IR950. Not shown: B+W 091 which went AWOL during the test and is still missing.
Here’s what I did:
(1) I took two photos with each of these filters, first with the camera’s white balance calibrated to some green foliage, and second with the white balance calibrated to a a gray card which some people say gives better results.
(2) I opened the images in Photoshop. Depending on the filter used, the contrast of the images varied, but as expected, all were flat (low in contrast). To make things as fair as possible, I used the “auto” button in the levels adjustment in Photoshop so each image was set to “average” contrast. The results at this point were not ideal but at least it was a level playing field.
(3) Using Photoshop’s channel mixer, I swapped the red and blue channels. (If you’re not familiar, the red channel, by default is 100% red and 0% blue so you set it to 0% red and 100% blue. Then you move to the blue channel which is by default 100% blue and 0% red, and you switch these to 100% red and 0% blue).
This is where things got complicated. Almost all the photos had skies that were either to dark or too cyan (blue-green). So:
(4) For the skies, I made them lighter if needed and where necessary, shifted the sky color from cyan to blue. (I did this using the blue hue slider in Lightroom but I could just as easily done it in Photoshop). Since I was only adjusting the blue hue it took just a second and did not involve any selections, paths, masks, etc. Hate that stuff (subject for another post).
(5) Finally, there was the foliage. I wanted it to be as brilliant white as possible but without losing too much detail. If you’re ever taken photos of snow in sunshine, you know there’s a sweet spot between dingy gray snow and brilliant, blank white that has no detail. So, to the extent possible, I lightened the foliage while trying to keep some detail. (Lightening the foliage also had the advantage of reducing color casts in the foliage; almost like bleaching).
So here are the results with my comments. Unscientific? You bet. But given the variables, such as different camera brands and sensors–and my not knowing what you want your infrared photos to look like, I offer this as a starting point. Beyond that, to each his own. We’re not aiming for realism here so whatever looks good to you is “right”.
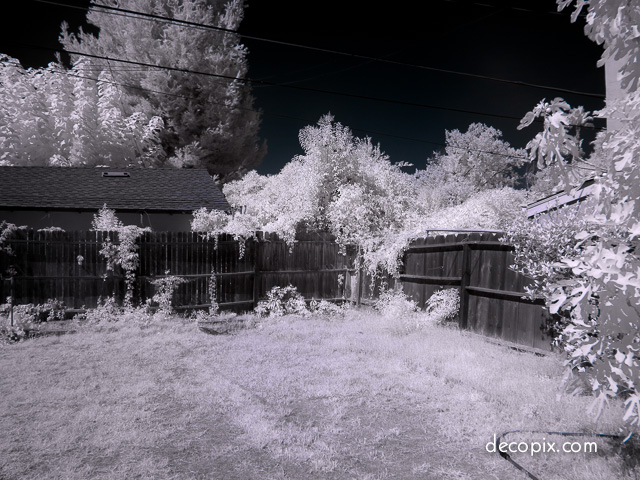
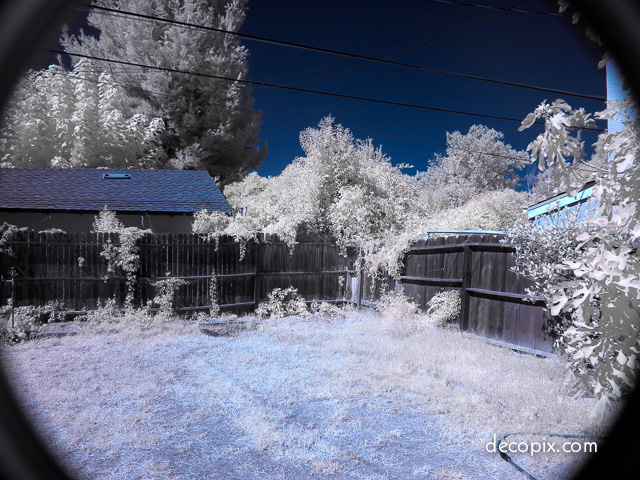
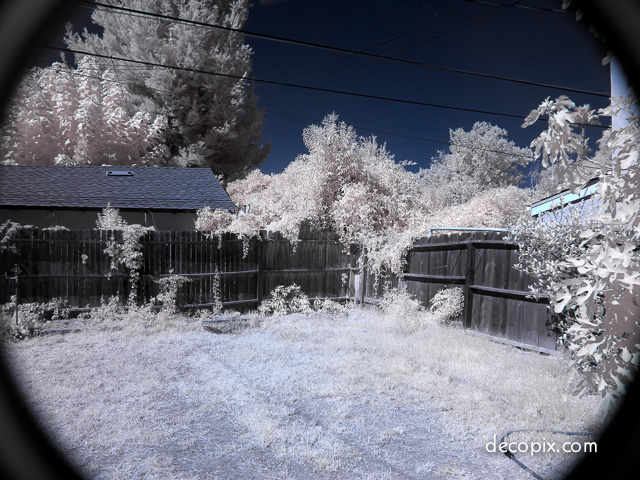
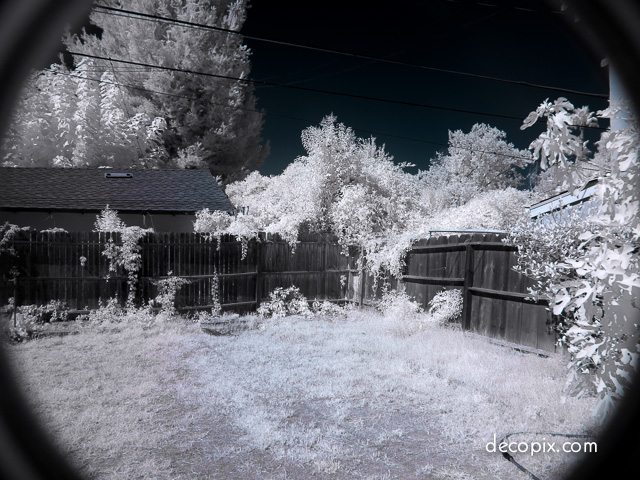
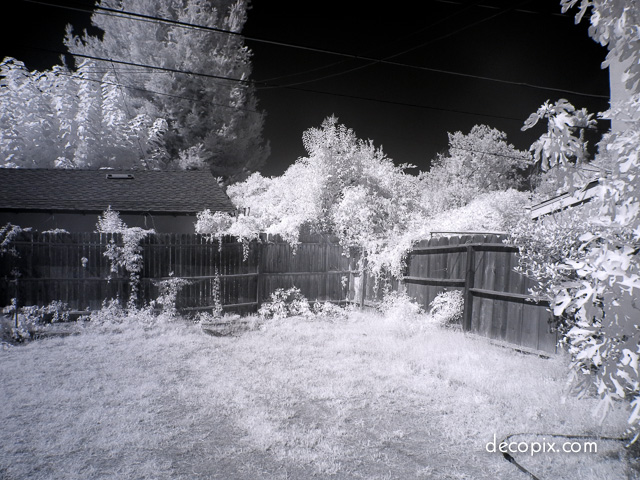
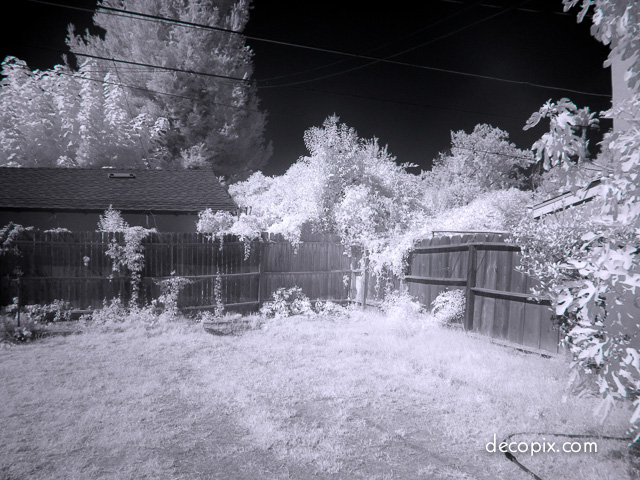
Hoya R72 (aka RM-72). Camera white balanced to green subject. Sky dark, with very little blue. Unable to get blue in sky without turning foliage blue/magenta. Unable to lighten foliage enough without losing detail.
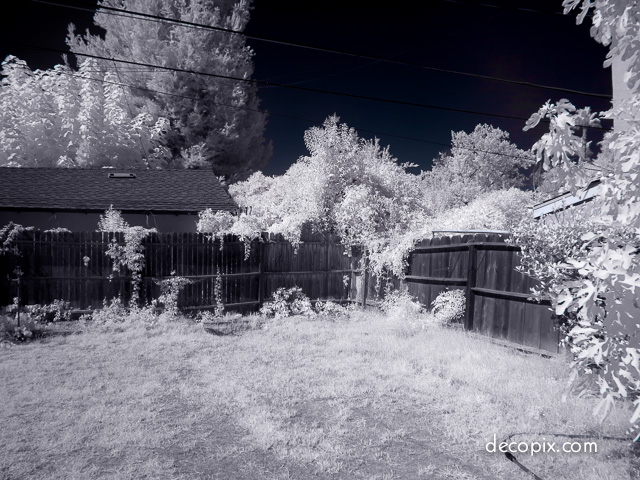
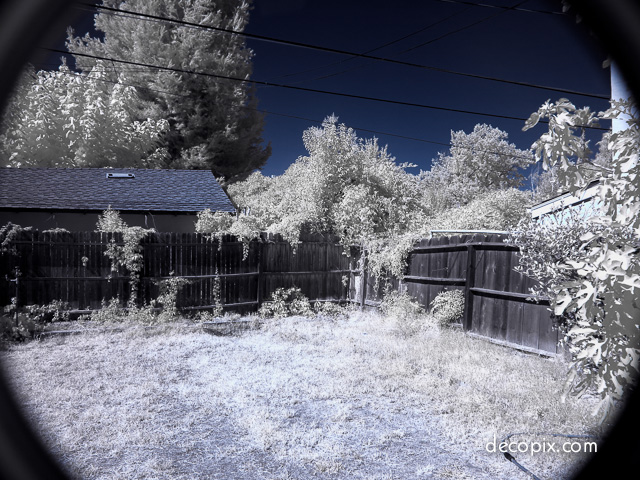
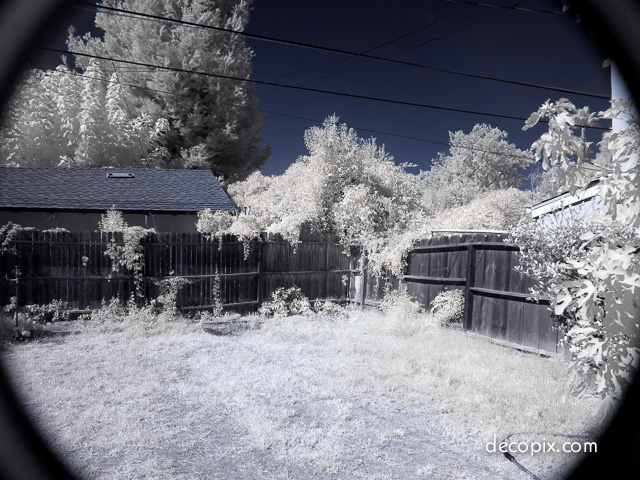
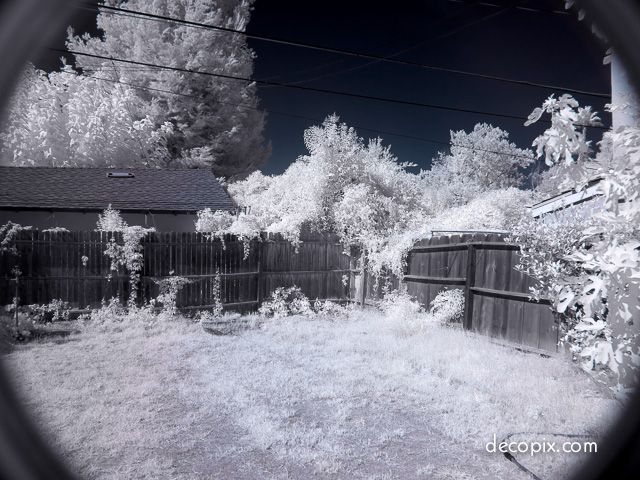
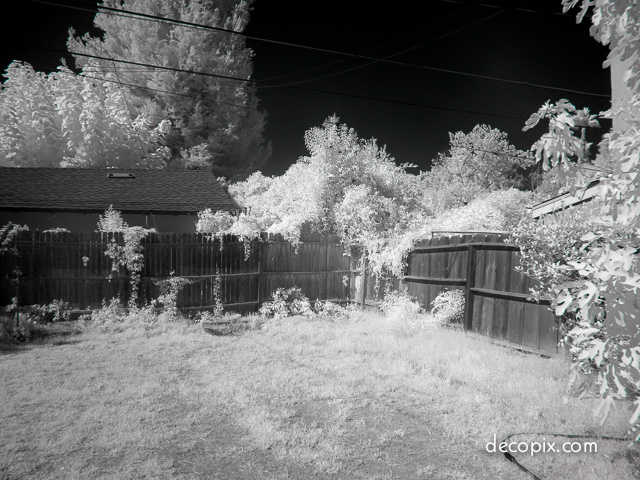
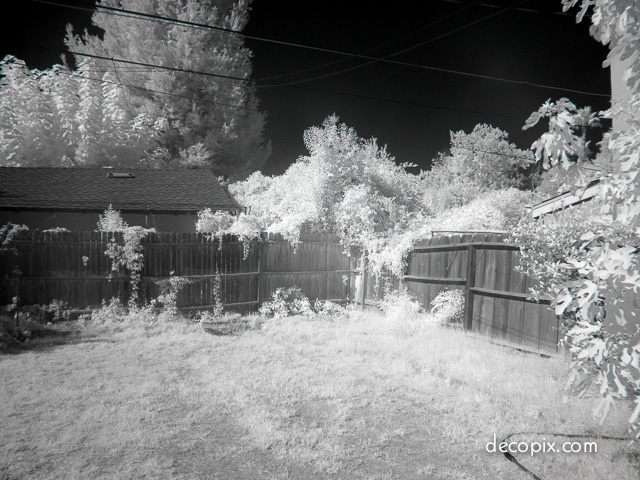
Hoya R72 (aka RM-72). Camera white balanced to gray card. My personal favorite. It may not be obvious because the sky is so dark but it has a very nice blue tint and at the same time, the foliage has just a trace of cool blue and is rendered fairly bright.
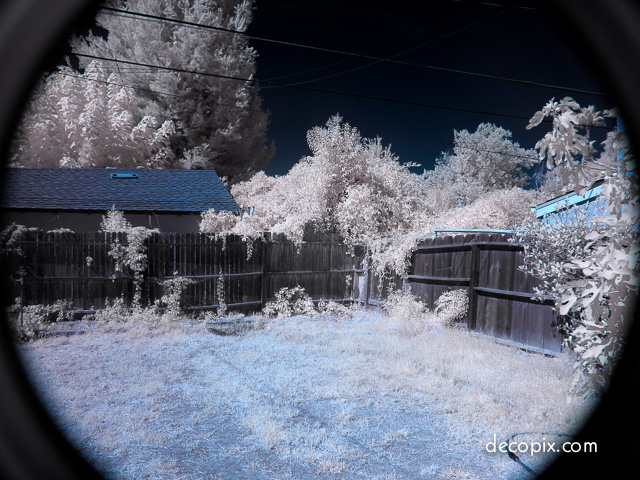
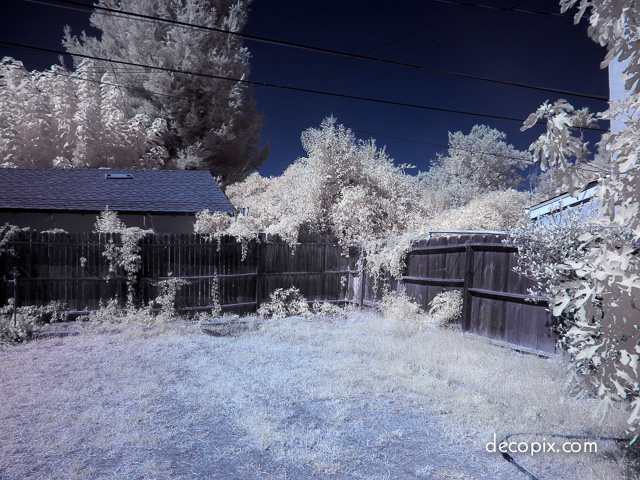
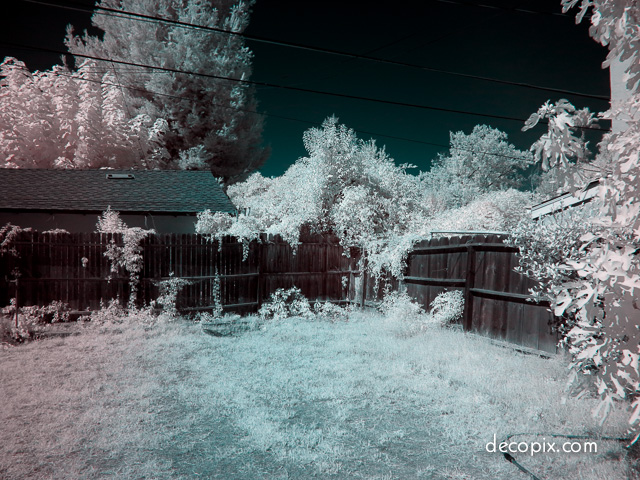
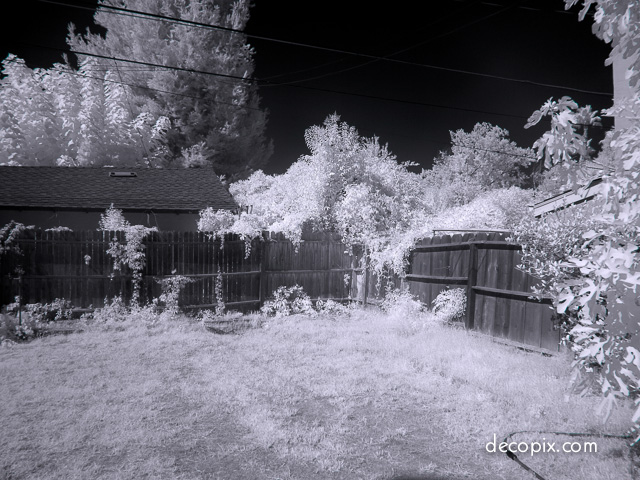
(If you’ve ever wondered what happens when you put a 52mm filter in front of a wide angle lens that takes a 58mm, here’s your answer.) Hoya #25 medium red filter. Camera white balanced to green subject. You wanted a blue sky and here it is. But be careful what you wish for–the buildings to the left and right have turned blue and the ground is blue as well. Still, pretty nice and as a bonus, #25 red filters are cheap and exposures are shorter since these filters pass a lot of visible light.
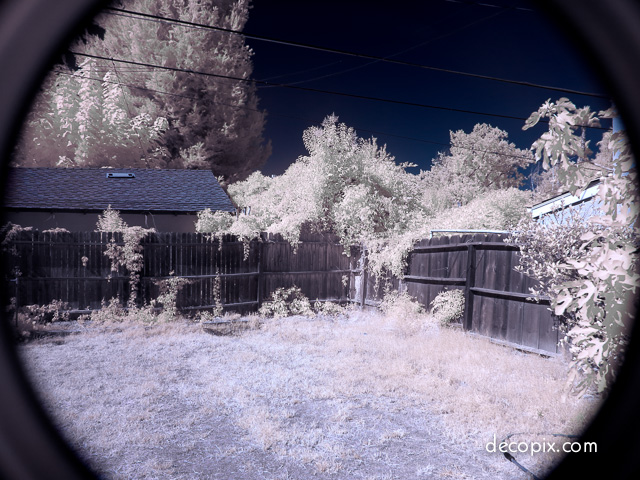
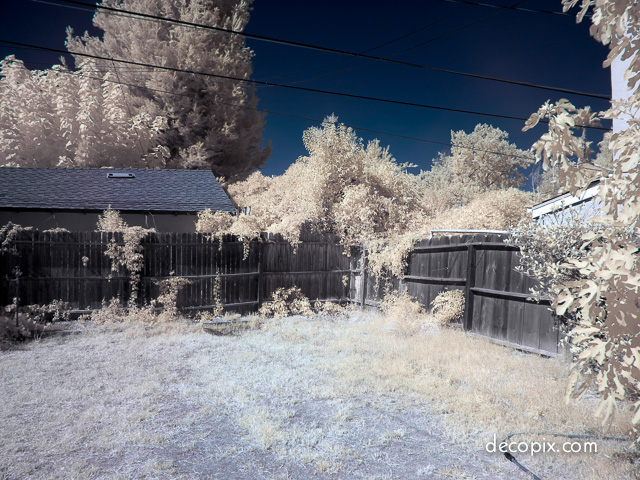
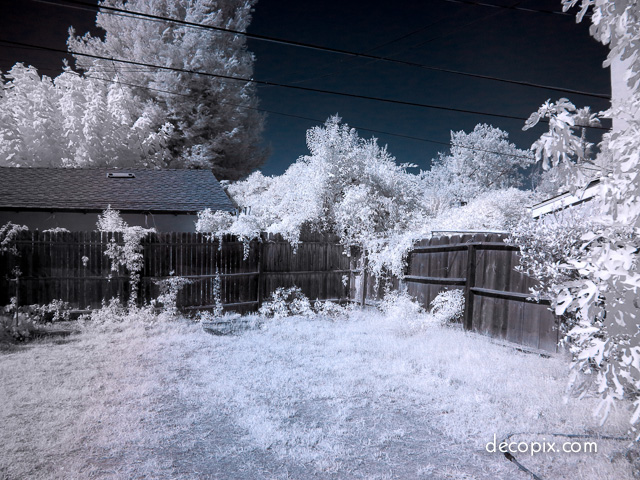
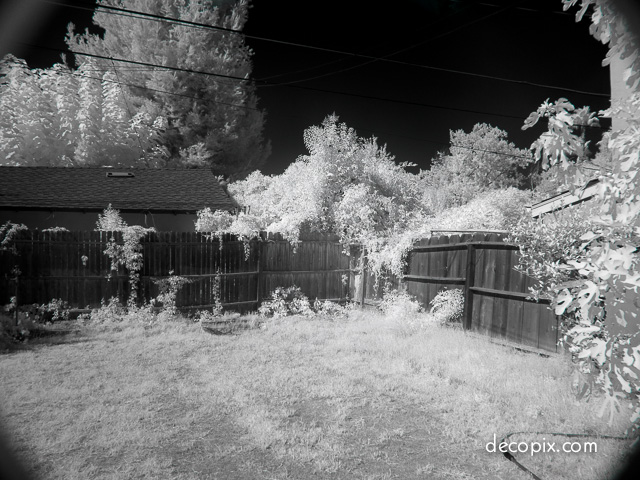
Hoya #25 medium red filter. Camera white balanced to gray card. A bit more subtle than the green balanced shot above however the foliage isn’t as bright. Still, a good choice.
Kenko (Hoya) PR-60. Camera white balanced to green subject. An obscure filter I picked up in Japan years ago, the PR-60 is a #25 red plus a polarizer. This filter gives very dark skies on black and white film (you can achieve the same thing by stacking a red filter and polarizer, I suppose) and with infrared the results are like… a 25 red plus a polarizer. Good news: dark, dramatic blue sky. Bad news: when you adjust the sky to appear blue, a lot of things turn blue.
Kenko (Hoya) PR-60. Camera white balanced to gray card. Not bad; less blue “contamination” than the green balanced shot, above.
Tiffen #29 (dark red). Camera white balanced to green subject. Beautiful blue sky but the adjustment to make the sky blue makes other things blue as well.
Tiffen #29 (dark red). Camera white balanced to gray card. My second choice. Beautiful blue sky but as with all the filters that pass some visible light, the adjustment to make the sky blue makes other things blue as well.
B+W 091 (dark red). Camera white balanced to green subject. Being European, B+W filters are classified using Schott numbers unlike Japanese filters which use Kodak’s Wratten numbers. Long story short they’re typically not exact equivalents. This being the case (and since I had the filter anyway) I thought I’d compare B+W’s dark red with Tiffen’s dark red. Sure enough, there was a difference. I thought the foliage looked a bit better with the Tiffen #29 filter. Also, the 091 showed more color unevenness from left to right. This seems to be an artifact caused by wide angle lenses and is worse with filters that pass some visible light (as opposed to the true infrared filters.)
B+W 091 dark red. Camera white balanced to gray card. Nice blue sky. This one shows red in the foliage and you can adjust the red hue to give the foliage a gold/brown color if you like.
Harrison & Harrison Infrared. Camera white balanced to green subject. A true infrared filter (no visible light) this one from old time filter maker Harrison & Harrison did a good job with the foliage and allowed a little blue in the very dark sky. I had to push the blue hue pretty hard though, so some things that I didn’t want blue ended up that way.
Harrison & Harrison Infrared. Camera white balanced to gray card. As expected, not a lot of difference vs. the previous example because true infrared filters pass mostly or entirely infrared won’t be affected much by white balance.
MaxMax X-Nite XDP. Camera white balanced to green subject. By any measure, the most unusual filter in this test, the XNXDP filters two different bands and obviously gave differing results depending on the angle of the light hitting the lens. Not ideal for my purposes but I give MaxMax a lot of credit for an unrelated issue. The MaxMax guy was among the first to point out the advantages of removing anti-aliasing filters from digital cameras. The results were impressive and now Nikon and Sony offer this option.
MaxMax X-Nite XDP. Camera white balanced to gray card. Still some color banding but the foliage and sky look great, I think. I’ll have to try this with a longer focal length lens to see if I can get uniform color.
Hoya RM-90. Camera white balanced to green subject. The RM-90 is an expensive filter and because it passes no color, you won’t see any in your results. My attempt to get a blue sky put a small amount of blue in everything but this is basically a monochromatic image. If you are certain you want black and white only, the RM-90 will give a little bit more dramatic results than much less expensive the R-72 but the R-72 can be used for color or black and white.
Hoya RM-90. Camera white balanced to gray card. No amount of adjusting would put any color into this image which is what is supposed to happen with a filter in the 900nm range. If this is what you’re looking for, see the results for the Newer 950 filter, further down, which costs less than $20.
Kodak #87C. Camera white balanced to green subject. Essentially the same as the Hoya RM-90, above.
Kodak #87C. Camera white balanced to gray card. Again, as expected, similar to the Hoya RM-90.

Newer 720 filter. Camera white balanced to green subject. Last but not least, some very inexpensive filters from China, available on eBay. Held up to my eye, this 720 filter passed a fair amount of visible light, unlike the Hoya R-72. It worked reasonably well but one thing you won’t be able to see on the web is that the image edges weren’t as sharp as they were with the Hoya filter. Since soft edges with wide angle lenses are a problem with infrared photos, this might be something to consider.

Newer 720 filter. Camera white balanced to gray card. This result is obviously much better but again, there is some softness to the image edges. But for $12, I’m not complaining.
Newer 950 filter. Camera white balanced to green subject. The Newer 950 gave results pretty similar to the Hoya RM-90. I didn’t see the loss of edge sharpness I saw with the Newer 720 so if you’re looking for black and white results, only, I’d call the Newer 950 a buy.
Newer 950 filter. Camera white balanced to gray card. When I think of the effort I used to go through, to get a result like this on film (and I didn’t know what I had until later) it’s amazing to see this. Highlight separation wasn’t nearly as good as the Hoya RM-90 but the price wasn’t nearly as high, either. As with the RM-90 H&H, 87C this filter is for black and white only but if that’s what you seek, it’s a fine, inexpensive choice.
What can be learned from this comparison? One thing is certain; my yard is in desperate need of landscaping. Beyond that, things are less concrete, but we can make some observations.
If you want to take infrared photos but your camera has not been modified for infrared use, use a true infrared filter in the 650 nm range, such as the B+W 092 or (my recommendation)–or–in the 720 nm range like the Hoya R72 (aka RM72). Exposures will be long with either filter but lighter filters such as red #23, 25 & #29 will not give a true infrared result and at the other extreme, infrared filters that block all visible light, like Hoya’s RM-90 or B+W 093 will act like a costly lens cap on an unmodified camera–you won’t get anything.
If you want to take infrared photos with a camera that has been modified to record infrared, you have 3 options, depending on the look you are trying to achieve.
Option #1: If you want a really blue sky and don’t mind having some blue seep into the rest of the photo, I’d go with a dark red filter such as a Tiffen #29 or a B+W 091. Set your camera’s white balance to a gray card or white sheet of paper to get a very blue sky–or–white balance to a green subject like grass for an ultra, super blue sky. These dark red filters have other advantages as well. They are less expensive than infrared filters and they can also be used to get foliage that looks gold (sort of.)
Option #2: If you want a dark blue sky but with minimal blue color in the foliage or elsewhere in the picture, use a Hoya R72 (RM-72) or a B+W 092. Set the camera’s white balance to a gray card or white sheet of paper.
Option #3: If you want black and white results only, the most dramatic results will be achieved with the 950-1000 nm infrared filters, such as the Hoya RM-90 or B+W 093. No need to set a custom white balance for these–they’re infrared only.
Note that any of the above options can be used to get a black and white final result; it’s just that with option #3, black and white is the only option.
I plan a few more posts on this but there is a wealth of information on the websites of companies that do infrared conversions.
Hi, I have a Nikon D5600. Which filter do you recommemd for that camera?
Thank-you, Dan
Hi Dan – I just sent you an email bur for the benefit of anybody else reading this, after using lots of different infrared filters and cameras over the years, I always seem to come back to the Hoya R72. The cheap Chinese filters don’t seem to be true infrared filters and for ome unknown reason, the B+W infrared filters have never worked as well for me as the Hoya. Muy second choice would probably be a Tiffen #29 dark red. I’m not a big fan of Tiffen filters and this particular filter is a “sandwich” of a gel filter between two pieces of glass, but it does work well for infrared.